Introduction
Installing a suspension lift in an off-road vehicle is a challenging and rewarding project. On this website, you can follow the complete installation process and read up on numerous ticks and trips on how to tackle the trickier tasks of such an endeavor.
The Vehicle
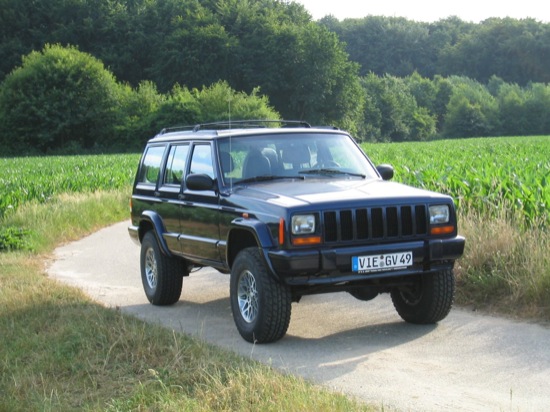
The 1997 Jeep Cherokee 4.0 Limited featured on this site was my trusty daily driver for more than eight years. After a career change in 2003 which required a once-a-week commute of 50 miles, I still kept the XJ for another two years, until I eventually decided to replace it with something a bit faster in 2005. The suspension was installed in 1999, by the way, so I used the Cherokee as shown below for about six years, and without any issues during that time.
The Suspension Kit
Even though the downsize Cherokee XJ was discontinued in 2001 and replaced with the Liberty KJ, there are still quite a few lift kits available for this vehicle, ranging from very mild lifts to killer setups requiring numerous follow-up modifications.
When I decided to lift my Cherokee by a few inches, I was looking for a suspension system that would give me room for bigger tires, higher ground clearance, and enough flex for mild off-roading without compromising on-road driveability too much. Also, since motor vehicle regulations in Germany are very strict, it was mandatory to be able to have the kit certified by the TÜV to keep the Jeep street-legal.
After reading tests in Four-Wheeler magazine and on the web, and getting some suggestions from other XJ owners, I purchased a Skyjacker 3″ Softride suspension system. The Skyjacker kit is a complete system with matching shocks, allows for up to 31″x10.5″R15 tires, and makes a very good impression with regards to engineering design as well as manufacturing quality.

The 3″ system (JC301KS) consists of:
- replacement front coil springs (JC30F)
- replacement rear leaf spring packs (JC25RS)
- replacement lower front axle control arms
- track bar relocation bracket
- Skyjacker Hydro shocks (H7016 front/H7018 rear; not shown)
Directly after the installation, which took about 11 hours total — it is possible to perform this as a single-person job! —, the truck gained a true 3″ in the back, and a surprising 3.5″ in front. Riding on 31″ Yokohama Super Digger Vs on the stock 7″x15″ aluminum rims, the total height gain eventually settled in at ca. 5 1/4″ in front and 4 1/2″, and the ride was pleasantly firm without being stiff.
The Website
This website gives you detailed installation instructions, based on what I learned while performing this installation, for the Skyjacker suspension as well as a Rubicon Express Slip Yoke Eliminator. In fact, this guide was the first “real” content I published on the web, and it has become rather popular with fellow Jeepers.
It first went online back in 1999 as a stand-alone site, was later merged into my personal weblog, and became an independent website with its own domain again in January 2010. During its history, the site's look-and-feel has changed a few times, some pages have been removed, and the text has been edited a bit, but its essence is still there.
The People
As with any project of this type, many people have contributed to this website in one way or another, and I am deeply grateful for their helpful suggestions, words of support, and more: Tom Grancy and his family for their hospitality and friendship. The Grass Valley Four-Wheelers for Winter Fun Fest good times, and especially Martin for a test-drive in his vintage Jeep. The members of the Cherokee forum at Jeeps Unlimited for freely sharing their expertise. Ralf Bergs for scanning the photos (hey, we're talking 1999, OK!) and for tackling site administration tasks. And, of course, my parents for generously surrendering their garage.
The Installation
The following pages cover the installation of the Skyjacker system in four steps: installing the front axle components, installing the rear axle components, performing important tweaks, and, finally, installing the Slip Yoke Eliminator. While some of the information specifically applies to the Skyjacker suspension and Rubicon Express SYE, respectively, you will surely find some useful tips and hints even if you plan to install a lift kit from a different a manufacturer on your vehicle.
Before you dive in, however, do familiarize yourself with the components of the lift kit you have purchased, read through its installation manual, read the manual again, and make sure that you have all the required tools in place.
If you run into any problems during the installation or find any errors in the instructions, please do not hesitate to contact me via email. Good luck with your project, and thanks for stopping by!
DISCLAIMER
Modifying a vehicle's suspension is not a trivial task. You can seriously injure yourself during the installation process and errors made during the installation may lead to failure of suspension components, potentially resulting in a crash.
Before getting started, therefore, make sure that you have the mechanical skills and the confidence required to perform this kind of project.
And whatever you do, and whatever happens, you acknowledge that it won't be my fault, OK? With that out of the way, let's get started!